Our Farmhouse Coop
- evergreenravine
- Apr 27, 2021
- 6 min read
Updated: Feb 27, 2023
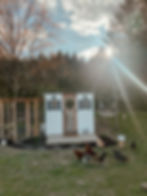
What came first, the chicken or the coop? Well.... in our case the chickens definitely came first. As I am sure many people probably suffer from the temptation of the baby chicks at their local farm store, we fell victim to those sweet little chirping balls of fur and ended up with 12 baby chicks. While I do not recommend getting an animal before you have researched them, we quickly figured out that it wouldn't belong before they would need a home. I had a vision for our coop that was a mashup of several ideas I saw browsing Pinterest. I knew that I wanted something appealing to the eye, but functionality was extremely important to me. At the top of my wish list was a walk-in style coop with plenty of space where we could store things like food, treats, extra egg cartons, medicine, etc. Also on my wish list was a cabinet style nesting box space where my family could easily access the eggs without having to stand outside. My amazing fiancé built me the coop of my dreams and I am very excited to finally share the details with you!
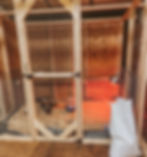
We wanted our coop to be roughly 8'x10'. This would allow enough space for our walk-in portion and also have room for growth should we ever get more, you know, chicken math. We started out building our coop in our garage. Since our chicks were currently living in our indoor patio (yes I said indoor) time was of the essence. We are blessed to have a Nonna who allowed the dusty poop filled babies to roam around her indoor patio. This got old quickly, so once we had a frame up we moved them into the coop as soon as we could.
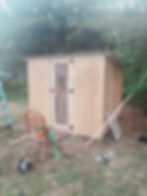
Once the frame and walls were complete we used a truck and some tie straps to drag the coop outside and with a few strong men and a crow bar we got it up on pavers. We used T1-11 for our siding and chose a basic shed style slanted roof. We had some left over roofing from when we replaced our barn roof so we went with the same black metal roof with the DripX coating to prevent condensation. One of my favorite things to do on a DIY project is to mix in sentiment. For this project, Armand made our coop door out of reclaimed barn wood from one of our old barn stalls. I love the way it turned out! I wanted the door frame to be cohesive with the reclaimed wood so I used my favorite stain, Briarsmoke to match the look. I love this stain because it gives the wood a weathered look with minimal effort. You can find it here > Varathane Premium Fast Dry Wood Stain Briarsmoke.

Once we achieved the look we wanted with the door we started our paint job. It was recommended to us that we use wood stain instead of paint to prevent chipping and to extend the longevity of the color. We went with Sherwin Williams WoodScapes stain in extra white. It was difficult to get the paint on with a roller due to the texture of the T1-11 but our good friend over at Valley Finishes LLC hooked us up and came to spray the coop for us and saved us hours of time on the stain application.
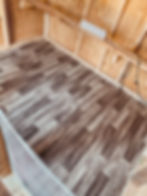
As far as the interior finishes go, for the coop floor we chose an inexpensive sheet vinyl that we purchased at Home Depot. I wanted one continuous sheet so it would be super easy to clean. We just cut it to size and stapled to our plywood floor. This was a super simple installation. For the storage portion, I chose a peel and stick vinyl plank. This was also super easy I just use a box cutter to cut them to size and just stuck them down.
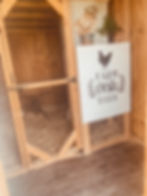
For our cabinet style nesting boxes we used leftover T1-11 and built a cabinet. with 4 spaces. I painted the front of the nesting boxes with a fun little design to add a special touch. We added a little wooden lip to the inside of the coop so the chickens good easily fly up to the boxes.
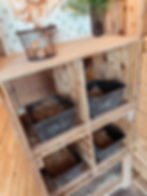
I found these black book boxes at Target last summer for a few dollars a piece and they make perfect nesting boxes. These are plastic and they can easily be removed and sprayed down for cleaning. We fill them with a little straw and the chickens love them!
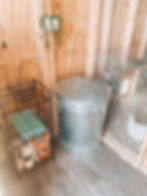
In this corner we keep our feed in this large aluminum trash can and use a little freestanding shelf for the chicken's treats, extra egg cartons and medicines. As you can tell the coop gets pretty dusty so most of the items we have in our coop can be easily wiped down.

Now on to the fun stuff, our exterior finishes! Our two farmhouse sconce lights were originally just for aesthetics, but now that we have electricity at our coop they look great lit up at night. You can grab them here > Black Sconce Gooseneck Barn Lights Our coop windows are actually playhouse/shed windows. We chose these because they are functional, easy to install and they allow for a breeze when it gets hot in the summer. These windows are 14" x 21" and they were the perfect size for our coop but they have smaller options available. You can find these adorable coop windows here > Playhouse Windows. You can't have these windows without the little black shutters they add the perfect touch. Grab the shutters here > Playhouse Shutter Black. I see some cute little window flower boxes in our future for these tiny windows. All of our interior and exterior door hardware was purchased from Home Depot. I love to swap out my decorations and wreaths seasonally. It is so fun to decorate the coop for the holidays. I can't find the exact wreath I have now but I love this option Artificial Eucalyptus Wreath.

We have slowly been adding things to our coop to fit our needs. This fall we decided to add a little floating deck to prevent mud slips. I think it made such a big impact on the overall look of the coop. Another modification we had to make was our run. As much as we wanted our chickens to free range, we had a couple losses due to hawks and ultimately decided the safest thing for our birds was to build a run. For our run we set 4x4 posts in concrete and wrapped 6ft galvanized wire fencing around.

Since these holes are fairly large, we buried 1/4" hardware mesh at the base of the fencing to prevent any predators from digging under the coop. For overhead protection we used aviary netting which you can find here > Bird Netting 25'x50' Heavy Duty Nylon. The small light you see attached to the coop post is a solar powered LED motion light and it does a great job of deterring predators at night because the sudden onset of bright lighting scares them away. I highly recommend these lights we have them all around the coop and we have watched several animals run away when they kick the lights on. Solar Motion Lights Outdoor
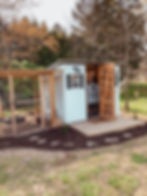
For our chicken door we chose to go with the Happy Henhouse which is an automatic door that can operate on either a timer or a daylight sensor. This is battery operated and has worked out great for us. It lets the chickens out for us in the morning and all we have to do is just go out in the evening to make sure they all made it in. We love this small business and the quality and ease of use is wonderful! You can find the chicken door we purchased here > https://amzn.to/3RyM52T

I think that just about wraps up our Farmhouse Coop. I had so much fun coming up with a design for this coop and it is so rewarding to watch it come to life. Thank you for reading! I tried to include all the details but I would love to answer any questions you may have. For the best response, please direct any questions to our Coop Instagram post here: https://www.instagram.com/evergreenravine/?hl=en You can also reach out via email at evergreenravine@gmail.com If you like seeing these details you can subscribe to my blog and give us a follow on Instagram. You can also use the chat function on the website for an immediate response!
xoxo Nikki

As an Amazon Associate I earn from qualifying purchases.

